How to set up your Outlook connector?
The connector setup is easy and takes a few minutes. But if you need help or have any questions, we remain fully available. At anytime, you can contact us by:
- Live chat (available at the bottom right of your screen)
- Contact form
- Booking a meeting with us
Not using Outlook? Click here to see the guide for Google connector.

How to set up your Outlook connector?
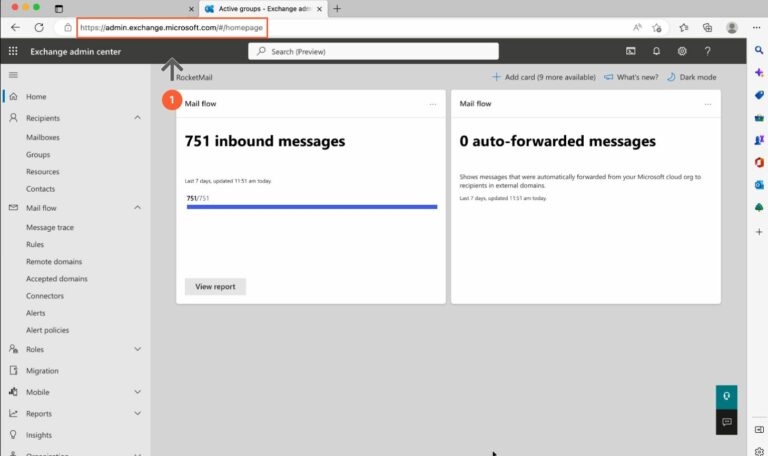
- Go to your Outlook Admin Console by clicking here
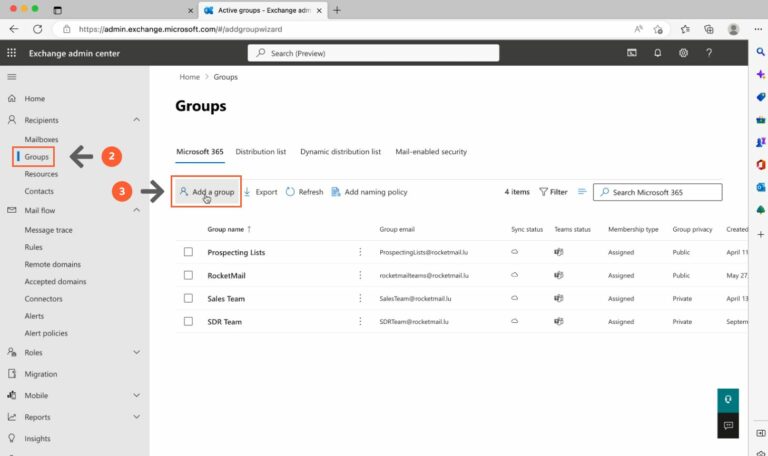
- Go to the "Groups" tab
- Click on "Add a group"
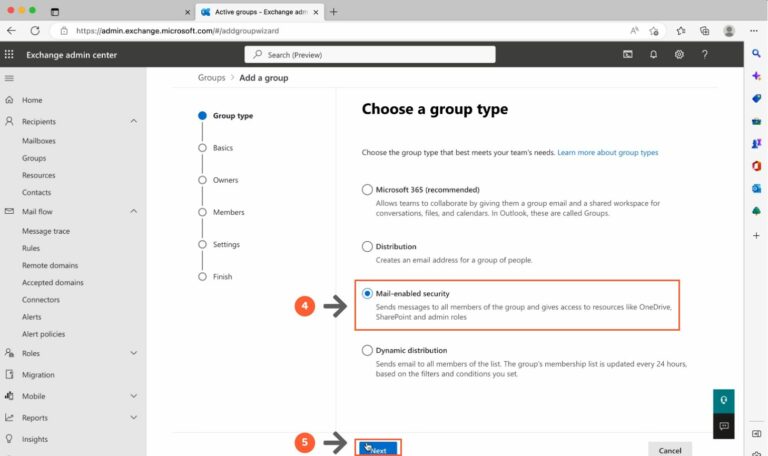
- Select "Mail-enabled security"
- Click on "Next"
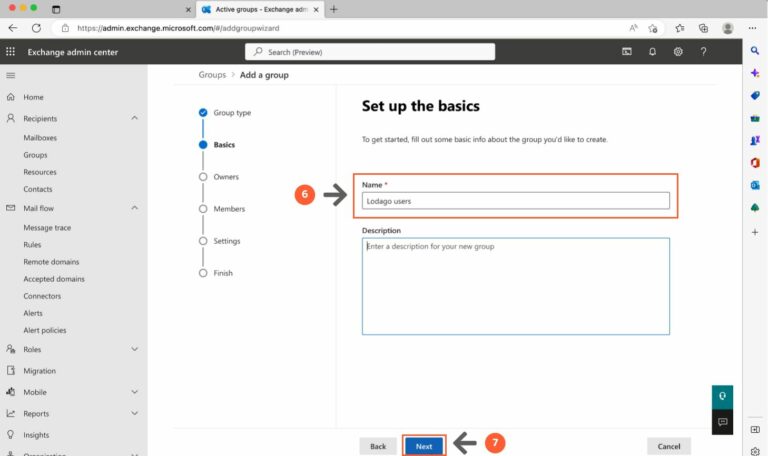
- Enter the group name "Lodago users"
- Click on "Next" to go to the next step
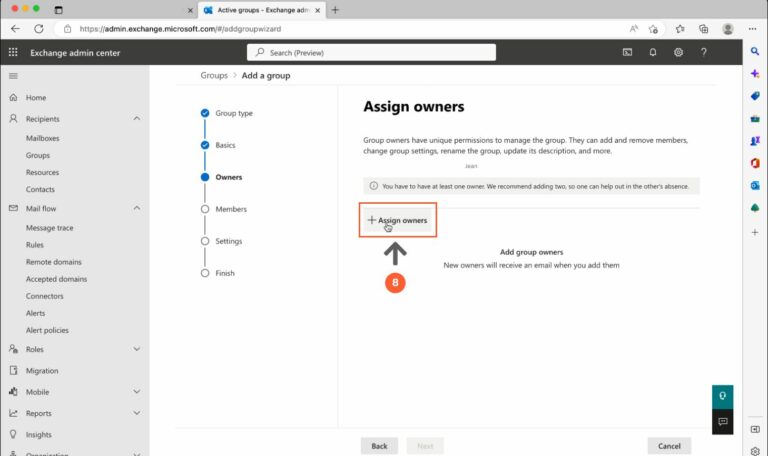
- Click on “Assign owners”
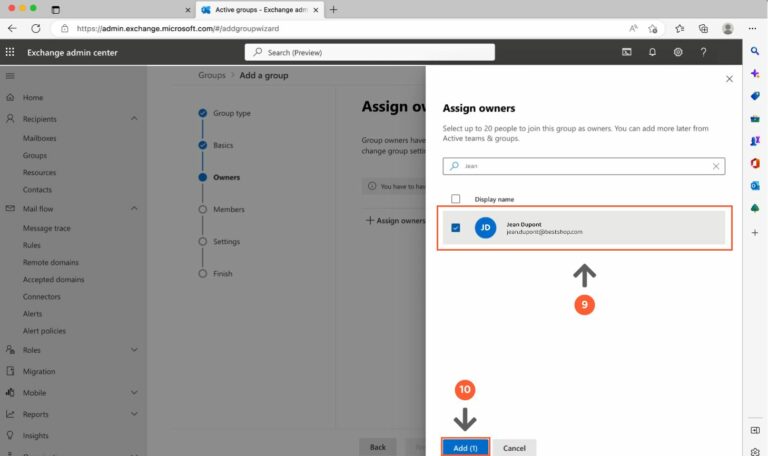
- Add the email of the group owner you want.
The group owner will manage the group. They will be able to add/remove members, change group settings, rename the group, update the group description, and more.
We recommend that the group owner is :
- the Lodago admin
- the admin or the person in charge of IT in your company.
- Click on "Add" and go to the next step.
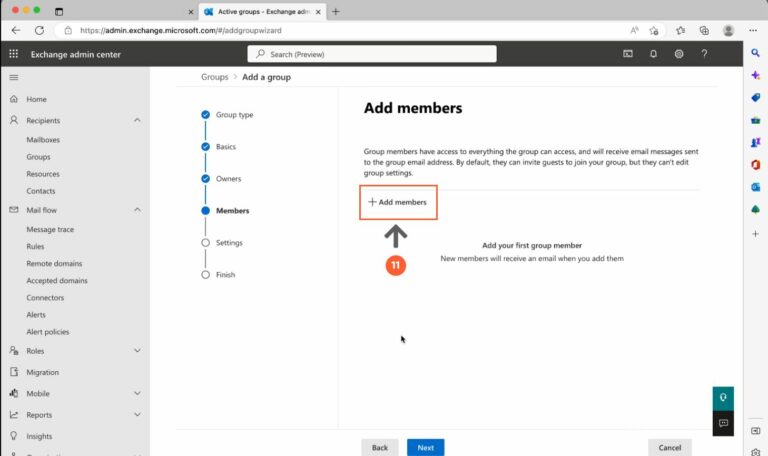
- Click on “Add members”
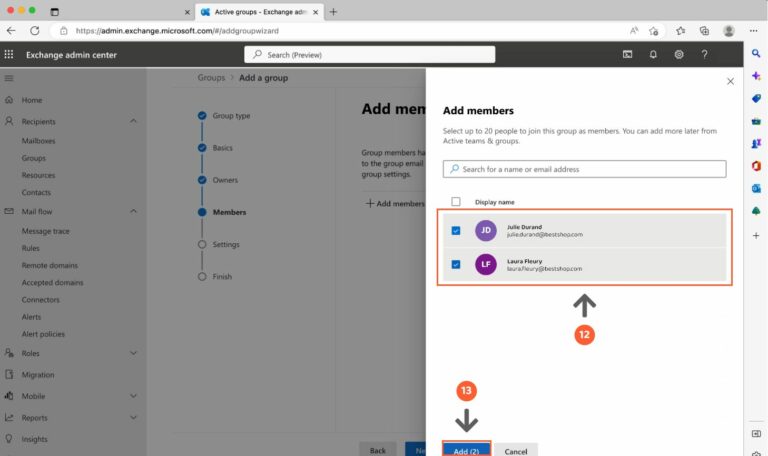
- Add members by searching for them in the search bar, then selecting them
- Once all members have been selected, click on "Add" and go to the next step.
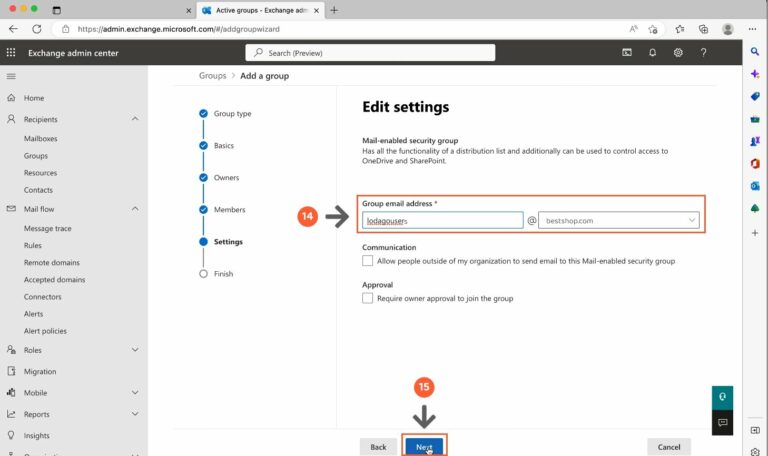
- Create an email address for the group "lodagousers@ domainname.com"
Warning: Replace @domainname.com with your domain name.
For example :
- if your domain name is bestshop.com, the group address will be lodagousers@bestshop.com
- if your domain name is superagency.com, the group address will be lodagousers@superagency.com
- if your domain name is iamlucky.com, the group address would be lodagousers@iamlucky.com
This group email address will be used so that we can send emails to all Lodago users in your company. By sending an email to this group email address, all users in the group will automatically receive this mail.
- Click on "Next"
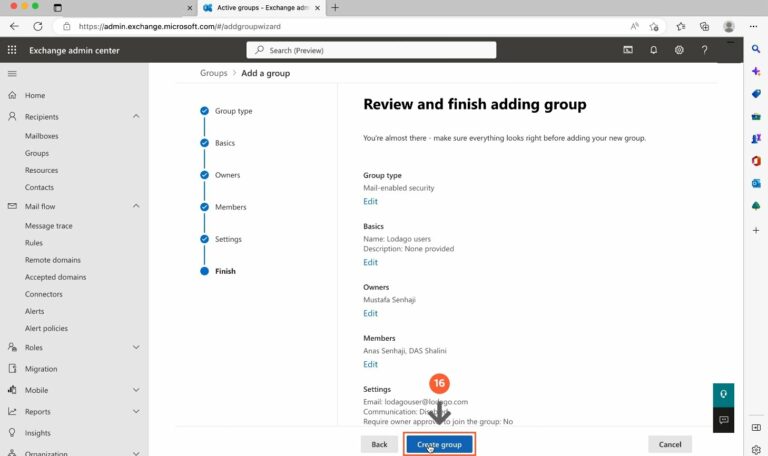
- Click on "Create group" and your group is created.
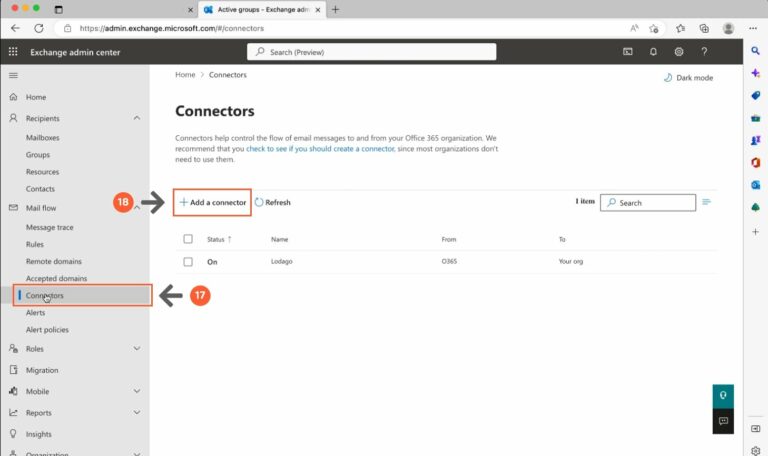
- Go to the "Mail flow" > "Connectors" tab
- Click on "Add a connector".
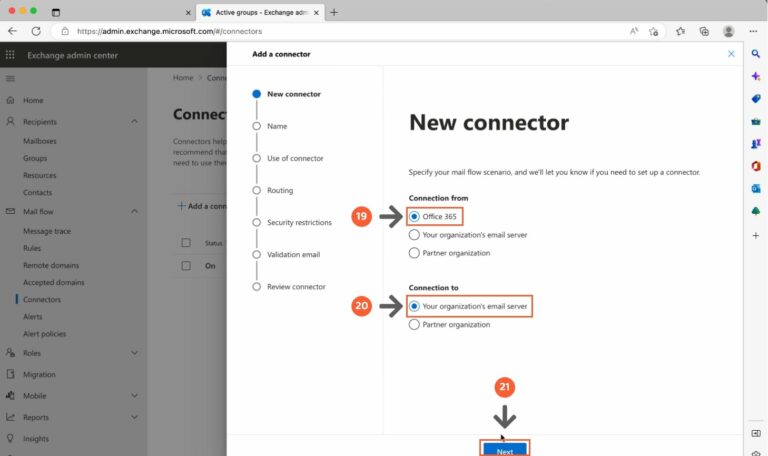
- Select "Office 365"
- Select "Your organization's email server"
- Click on "Next"
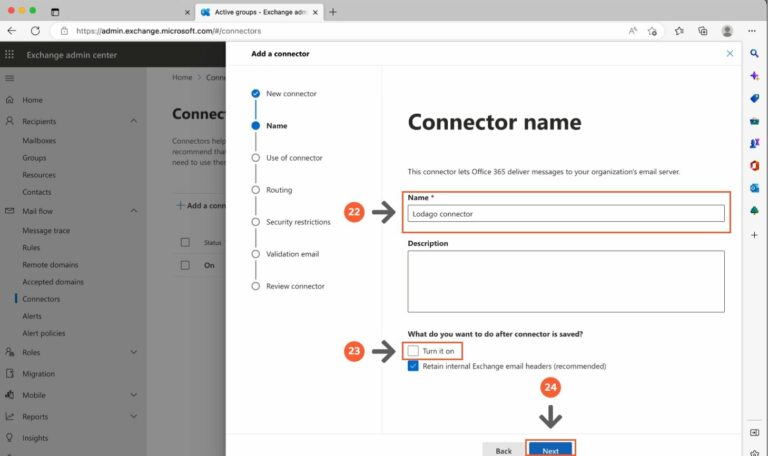
- Assign the name "Lodago connector" to your connector
- Uncheck the "Turn it on" option
- Click on "Next"
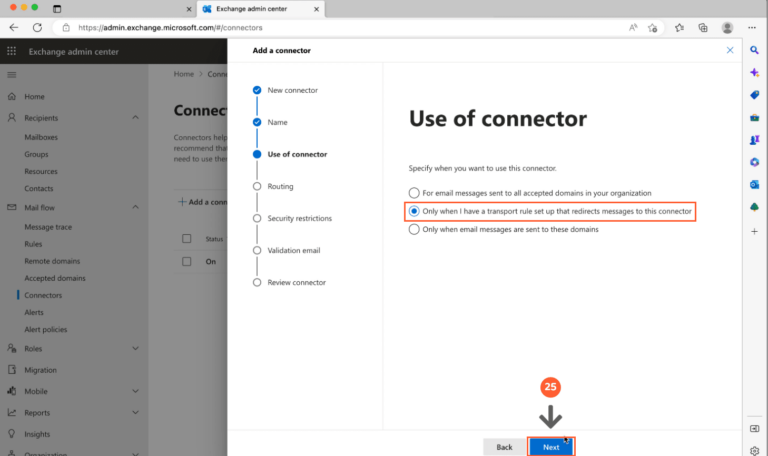
- Select "Only when I have a transport rule set up that redirects messages to this connector" and click on "Next"
- In "Routing", type "discovery.staging.lodago.com" in the input bar
- Click on the "+" button.
- Add the server name that we provide you by email.
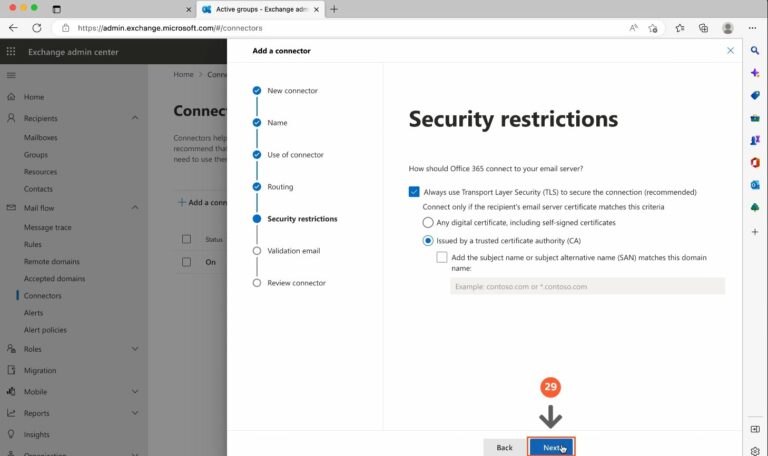
- Click "Next" a second time without changing the default settings for "Security restrictions".
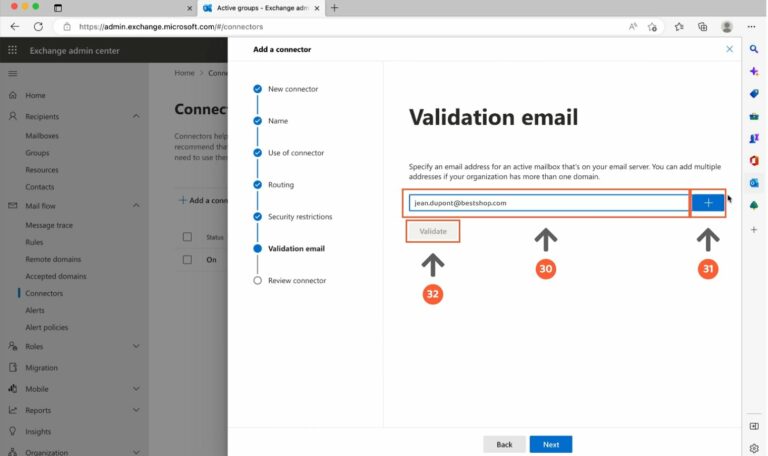
- Enter a valid email address in the input bar to test your connector.
This address will not be saved. You can enter any email address for this test, whether or not it is in the group you have created. For example, you can enter your email address, or the email address of one of the company’s employees.
- Click on the "+" button
- Click on the "Validate" button
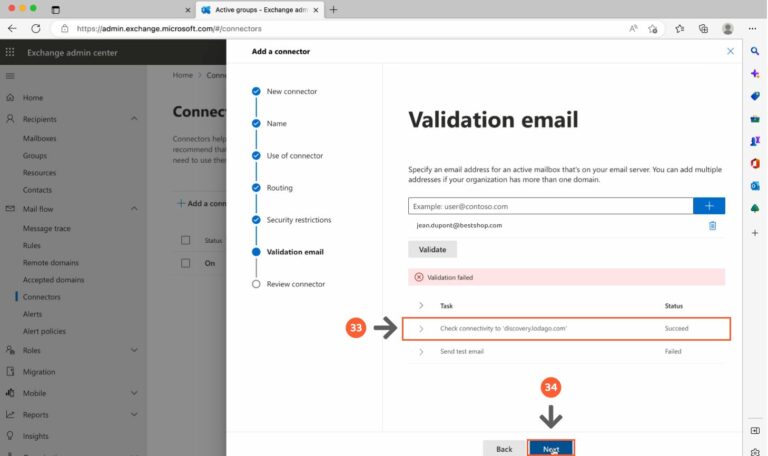
- After a few seconds, the validation is done. You may see a "Validation failed" message but the important thing is that the "Check connectivity to "dicovery.staging.lodago.com" task has a "Succeed" status.
- Click on "Next" to continue
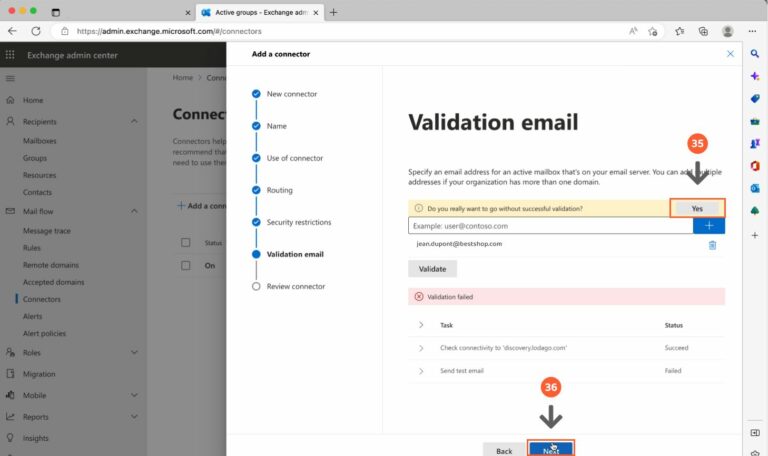
- If you get the message “Do you really want to go without successful validation?”, click on “Yes”
- Click on “Next”
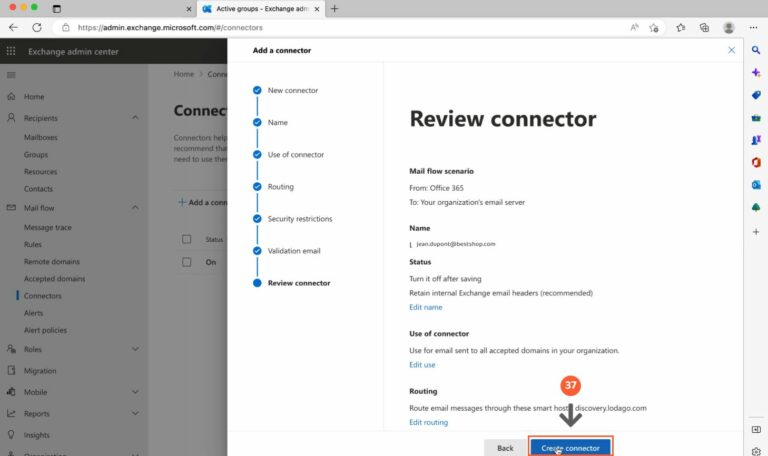
- Click on “Create a connector”
- Click on “Done”
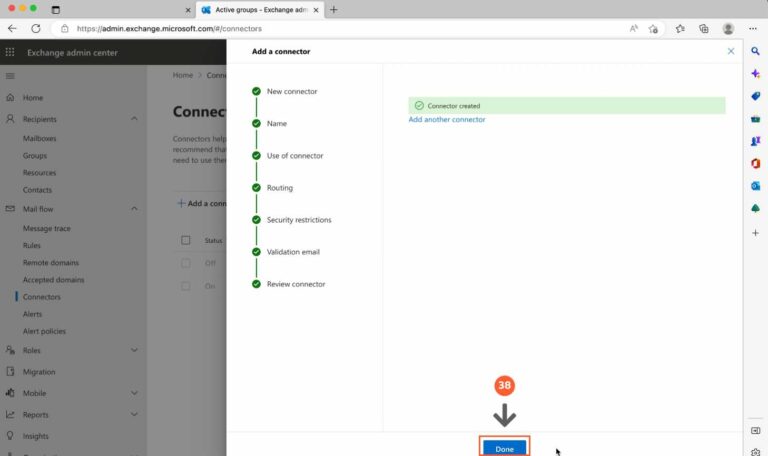
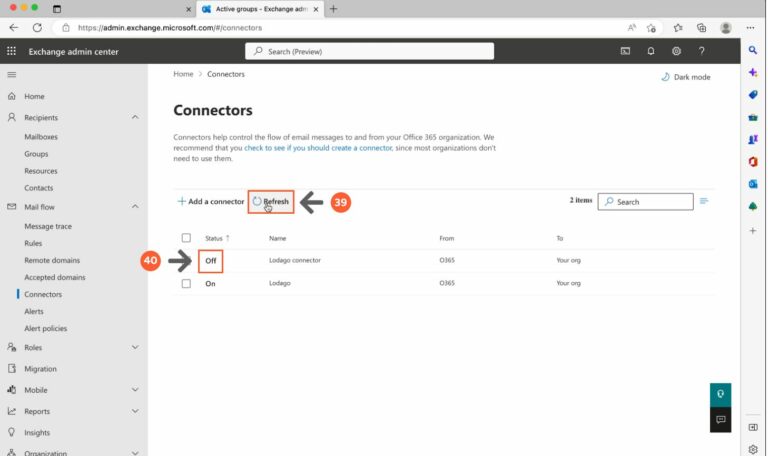
- Click on refresh
- Click on the status ("Off") of your connector
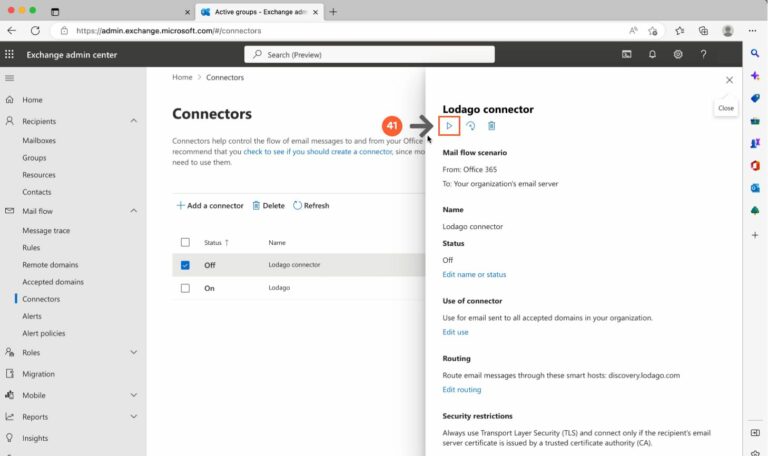
- Click on the play button
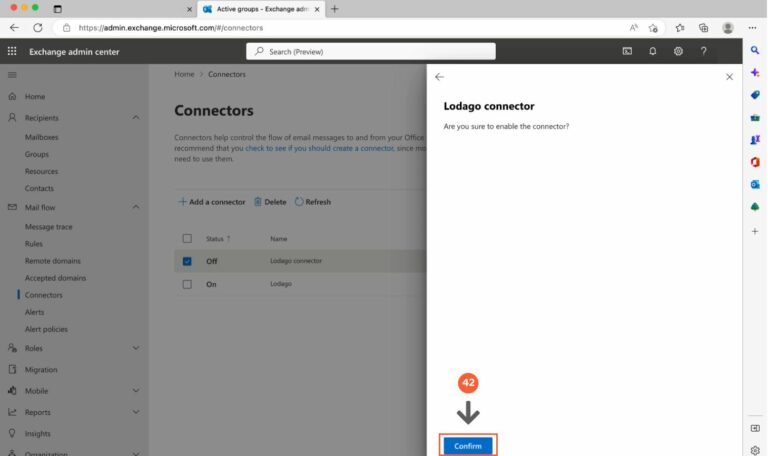
- Click on "Confirm" to activate your connector
- Once your connector has been successfully activated, go to the "Rules" tab
- Click on "Add a rule"
- Click on "Create a new rule"
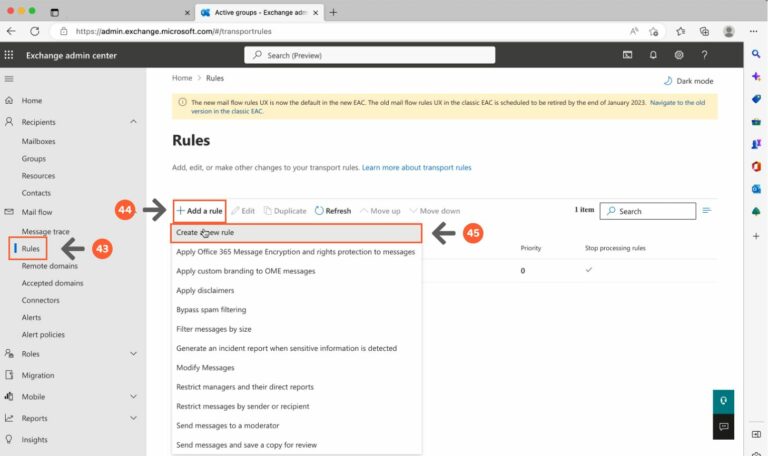
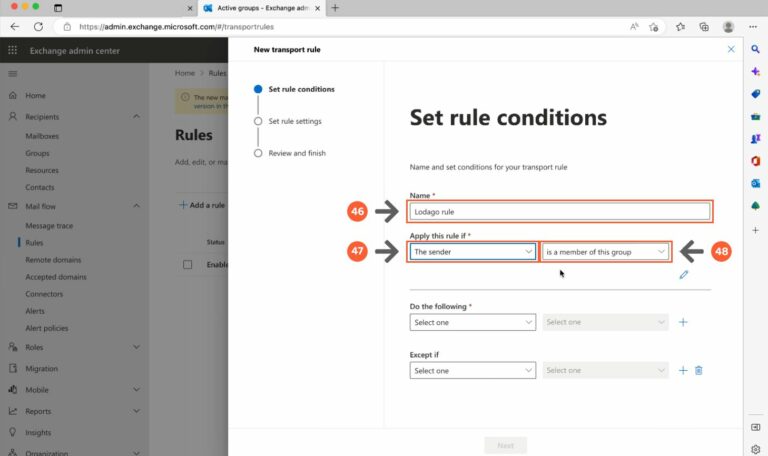
- Enter the name “Lodago rule”
- In "Apply this rule if", select "The sender" from the first drop-down menu
- Select "is a member of this group" in the second drop-down menu
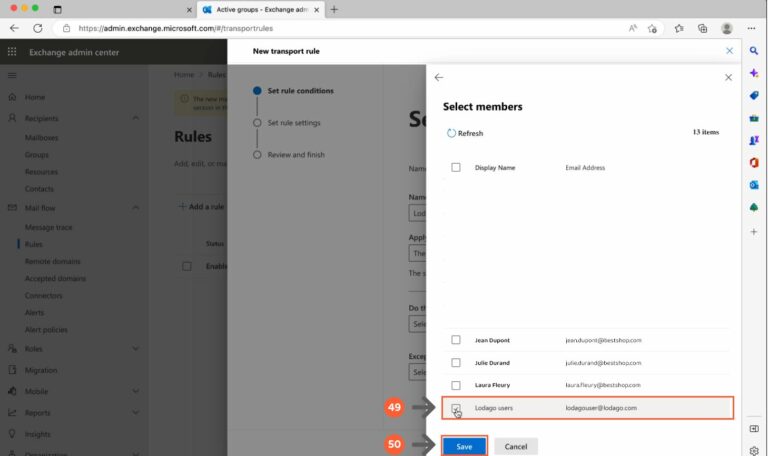
- A window opens, select the "Lodago users" group you created in step 16
- Click on "Save"
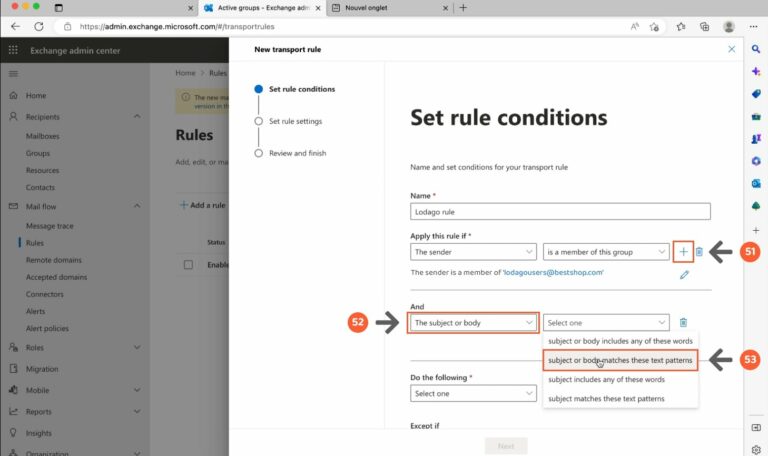
- Click on the "+" button
- Under "And", select "The subject or body" from the first drop-down menu
- Select "subject or body matches these text patterns" from the second drop-down menu
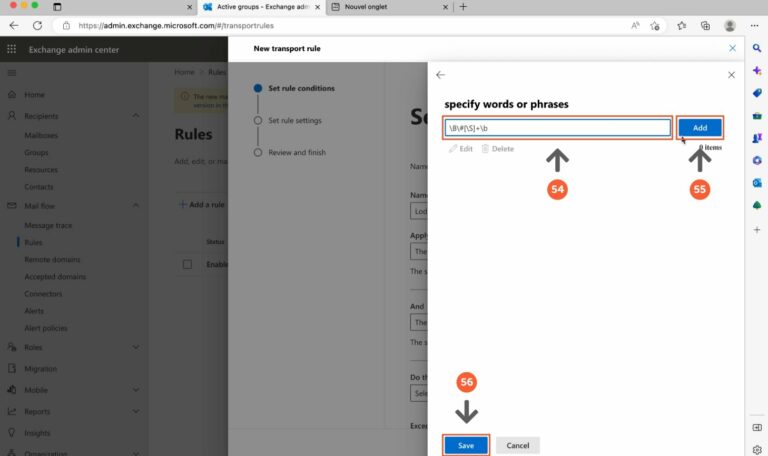
- Enter \B\#[\S]+\b in the input bar
- Click on Add
- Click on Save
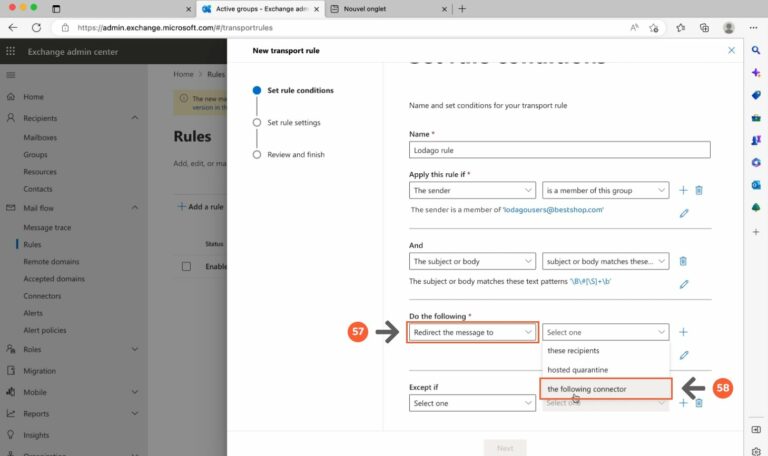
- Under "Do the following", select "Redirect the message to" from the first drop-down menu
- Select "the following connector" from the second drop-down menu
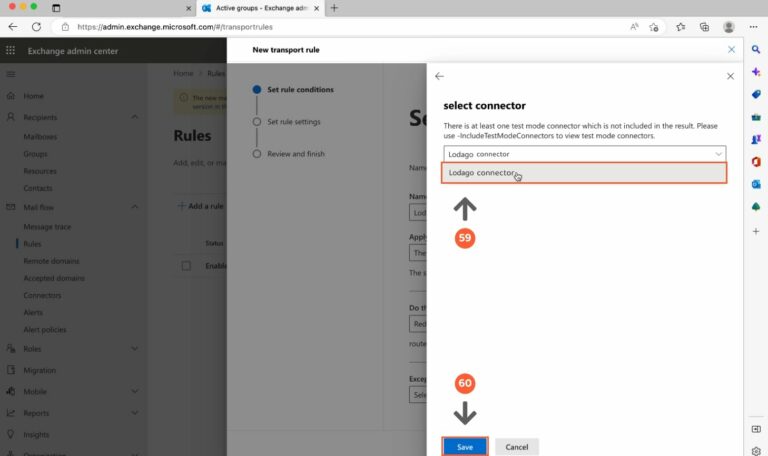
- Select the "Lodago connector" created in step 42.
If your connector does not appear immediately, wait for a few minutes and refresh the page until it does. After creation, connectors may take some time to appear.
- Click on "Save"
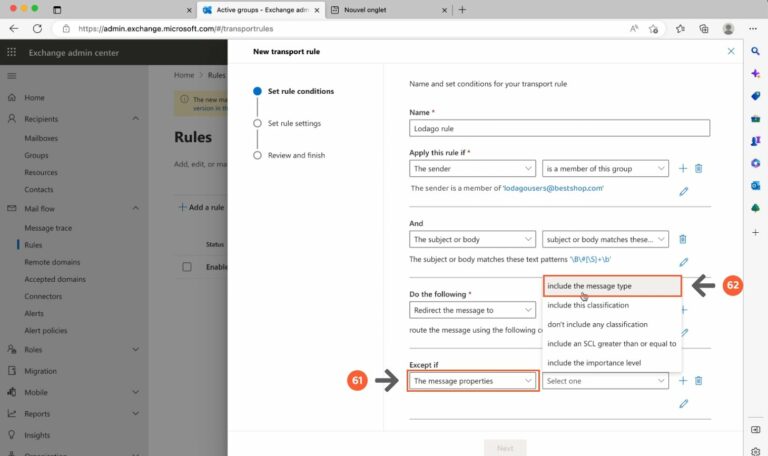
- In "Except if", select "The message properties" from the first drop-down menu
- Select "include the message type" from the second drop-down menu
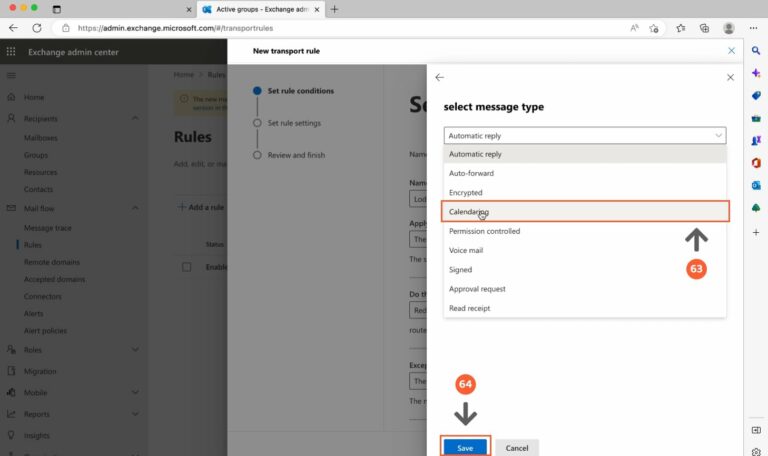
- Select "Calendaring" in the "select message type" popup window
- Click on "Save"
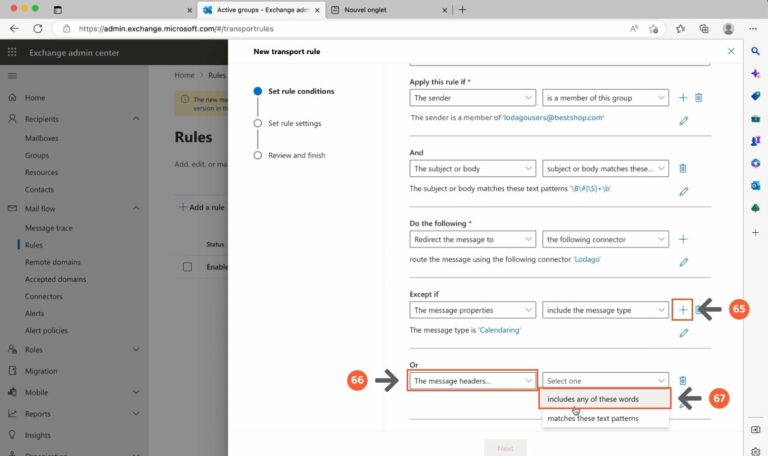
- Click on the "+" button to add an exception.
- Select "The message headers", from the first drop down menu
- Select "includes any of these words" in the second drop-down menu
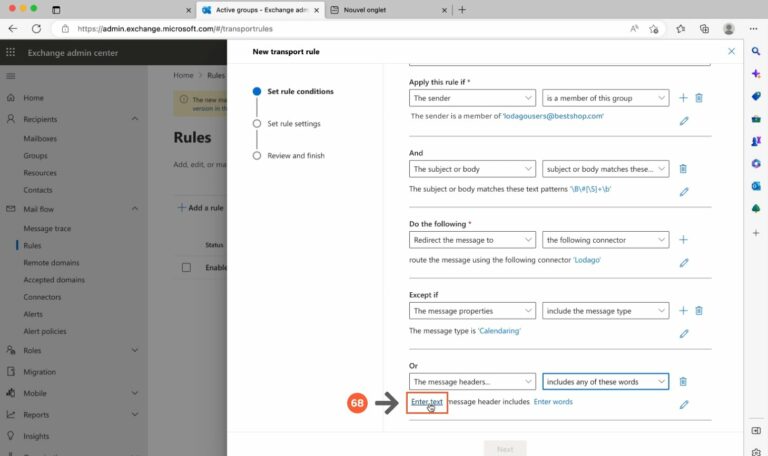
- Then, click on “Enter text”
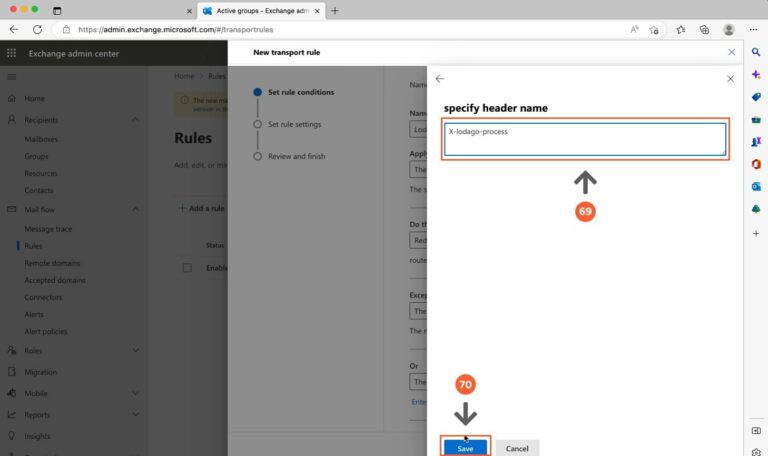
- Enter "X-lodago-process" in the input bar
- Click on "Save"
- Click on “Enter words”
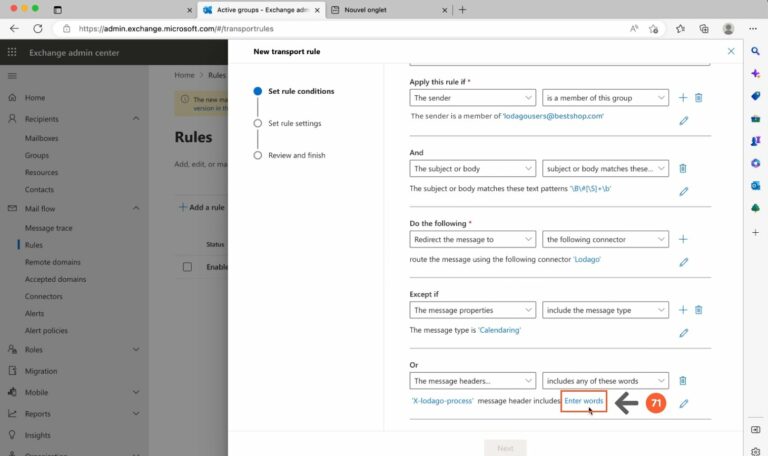
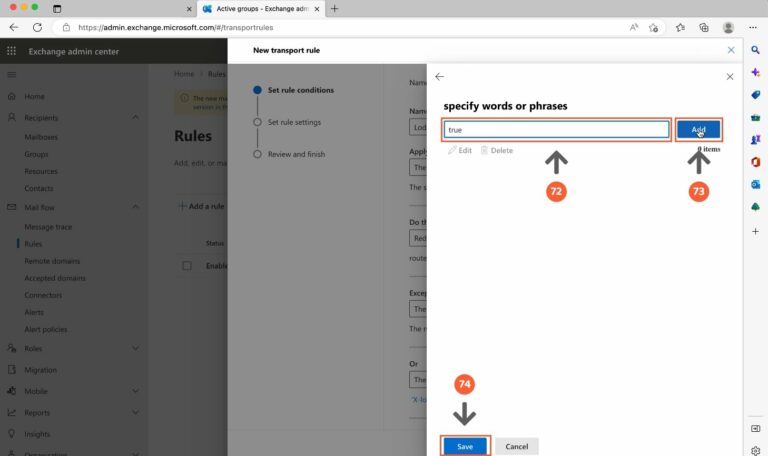
- Enter "true" in the input bar
- Click on the "Add" button
- Click on "Save" button
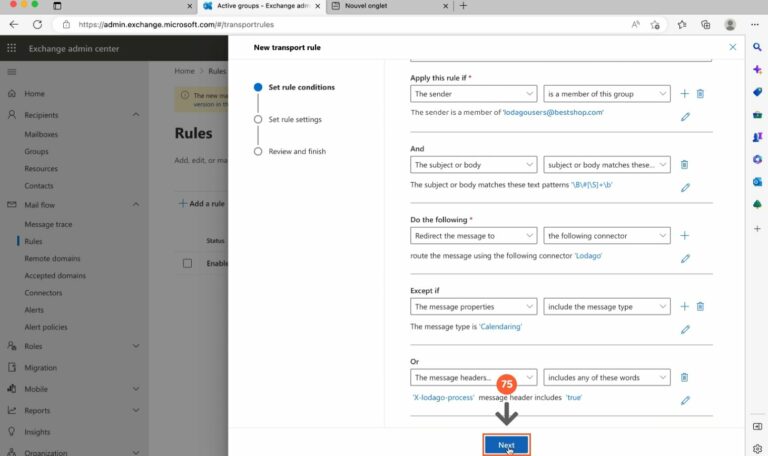
- After these steps, click on "Next" x2
- Click on “Finish”
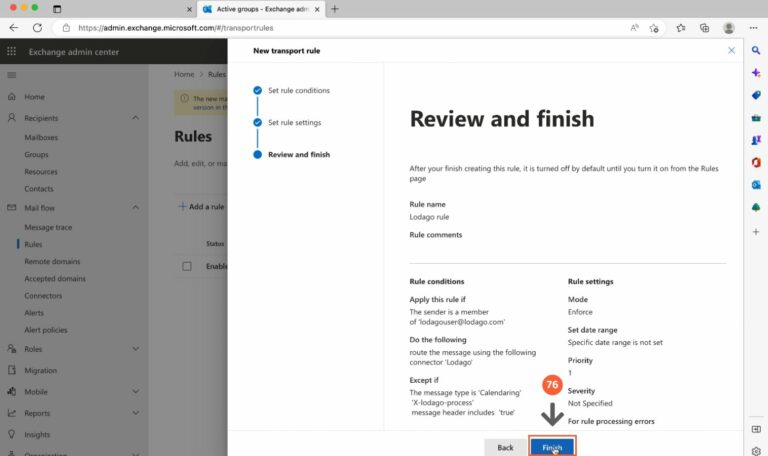
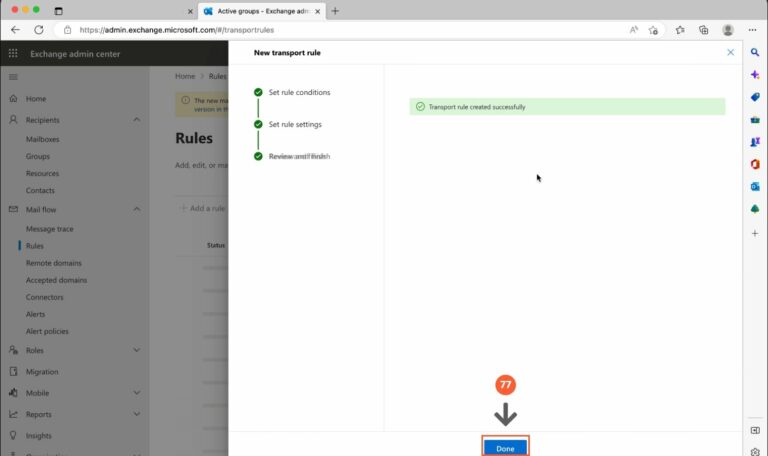
- Once the rule is created, click on "Done"
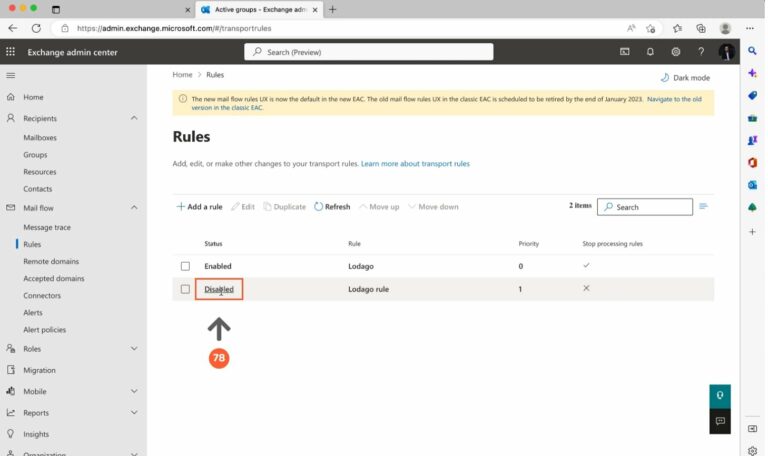
- Click on “Disabled”
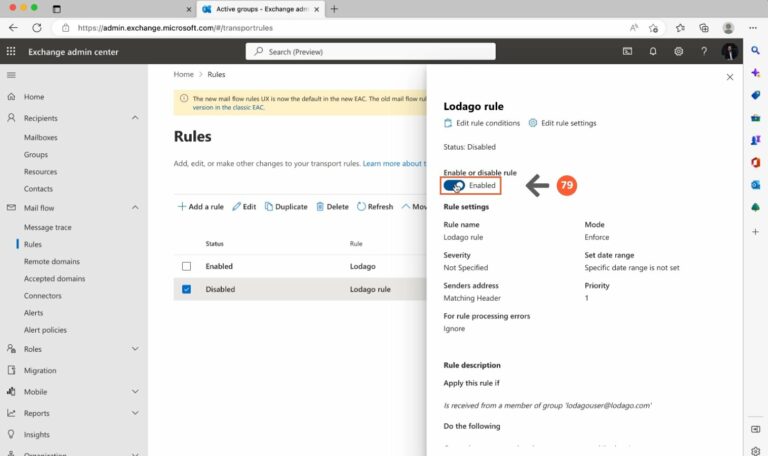
- Click on the slider to activate the rule
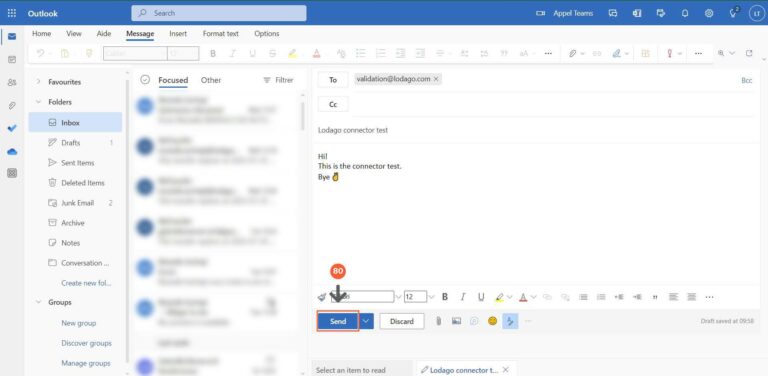
- Finally, send an email to validation@staging.lodago.com, from an email address in your "Lodago users" group, with the subject "Lodago connector test" to test your connection!
Content of the email:
Hi!
This is the connector test.
Bye ✌
